Essential Kitchen Equipment for Perfectly Toasted Bread Every Time
Discover the Most Effective Kitchen Tools for Toasting Bread
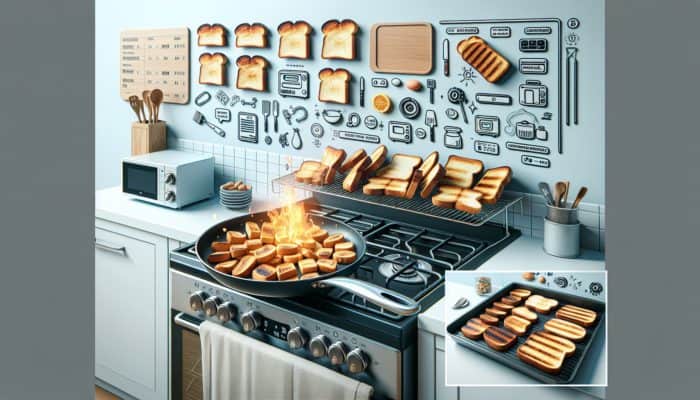
Exploring the various methods to create toast without a conventional toaster reveals an exciting array of culinary techniques, each utilising distinct kitchen tools that offer unique flavours and textures to your toast. The most commonly endorsed tools include:
- Frying Pan: An excellent choice for stovetop toasting, providing direct heat control and rapid results, ensuring each slice is toasted to perfection.
- Oven: Perfect for batch toasting, ensuring an even golden finish on multiple slices simultaneously, making it ideal for family breakfasts.
- Grill: Imparts a delightful charred flavour, making it particularly suitable for thicker slices of bread, creating a unique taste experience.
Using a frying pan emerges as the most accessible and user-friendly method; it allows for close monitoring of the bread, ensuring it attains the perfect degree of crispiness. Although the oven method requires additional time, it excels at consistently toasting larger quantities efficiently. Meanwhile, grilling imparts a unique flavour that significantly enhances the toast experience, especially if you seek a subtle smokiness in your meal. Each method can be tailored to suit various types of bread and the desired end result, making them versatile options in your culinary repertoire.
Effective Preparation Steps for Your Bread Before Toasting
Properly preparing your bread is crucial before embarking on the toasting adventure to achieve the best results. Start by allowing your bread to come to room temperature, which is vital for even toasting. Below are some effective tips for preparing your bread:
- Slice Evenly: Cut your bread into uniform slices to promote consistent toasting, ensuring each piece receives equal heat exposure.
- Consider the Type of Bread: Different breads possess unique toasting properties, and recognising these can lead to enhanced outcomes and better flavour.
- Storage Conditions: Ensure you use bread that has been stored correctly to avoid sogginess or excessive dryness, both of which can ruin your toast.
Slicing your bread evenly is essential as it guarantees consistent heat exposure for each piece, thereby minimising the chances of some slices burning while others remain undercooked. When selecting your bread, it’s vital to consider how various types—such as wholemeal, sourdough, or brioche—respond to heat. For example, denser breads like sourdough might require a slightly extended toasting duration compared to lighter varieties. Additionally, appropriate bread storage will significantly enhance its toasting quality; stale or overly moist bread can result in disappointing toast, which is something every home cook wishes to avoid.
Essential Safety Precautions for Toasting Bread Without a Toaster
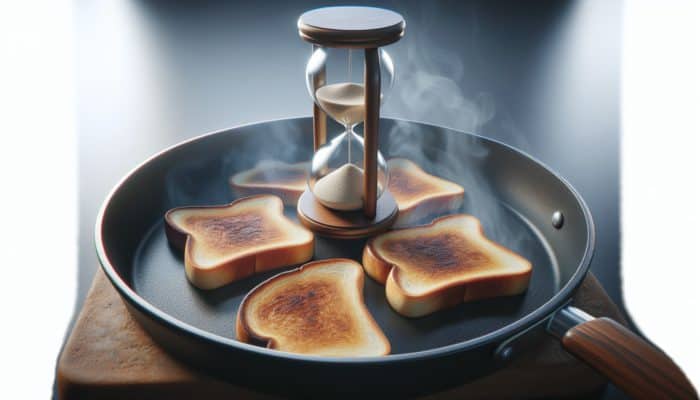
Toasting bread without a toaster introduces specific safety considerations. By adhering to a few straightforward safety tips, you can ensure the process is both successful and secure. Here are the essential precautions to remember:
- Use Oven Mitts: Safeguard your hands from burns when handling hot pans or trays, especially during the toasting process.
- Keep an Eye on Your Bread: Remain vigilant while toasting to avert burning; bread can go from perfect to charred in moments.
- Ensure Proper Ventilation: Open windows or utilise exhaust fans to avoid smoke accumulation, especially during high-heat toasting methods.
Wearing oven mitts is crucial, especially when interacting with hot surfaces or flipping slices in a pan. Bread can swiftly change from perfectly toasted to burnt, making constant vigilance imperative. Furthermore, ensuring adequate ventilation in your kitchen is vital for managing smoke, particularly with high-heat methods like grilling or broiling. Prioritising safety will contribute to a risk-free and enjoyable toasting experience, allowing you to focus on creating delicious toast.
Advanced Techniques for Perfectly Toasting Bread in a Frying Pan

Preparing Your Frying Pan for Optimal Bread Toasting
Setting up your frying pan for toasting is a simple yet effective process. Start by heating your pan over medium heat, which is optimal for achieving even toasting without burning the bread too quickly. If desired, adding a small quantity of butter or oil can enhance the flavour and assist in preventing sticking. Once the pan reaches the appropriate temperature, carefully place your bread inside, ensuring sufficient space between slices for proper heat distribution, which is key to achieving that perfect golden brown colour.
Regularly flipping the bread is crucial for attaining the perfect toast. Each side requires close monitoring; adjusting the heat may be necessary if the bread begins to darken too swiftly. It’s practical to check the bread every 30 seconds to assess its toastiness. This method provides flexibility, enabling you to adapt to the thickness of the bread and your preferences for crispiness. Ultimately, using a frying pan grants complete control over the entire toasting process, yielding optimal results that will impress your family and friends.
Determining the Ideal Temperature for Frying Pan Toasting
A medium heat setting is ideal for toasting bread in a frying pan. This temperature strikes the perfect balance, allowing the bread to toast uniformly without the risk of burning. Excessively high heat can char the exterior while leaving the interior soft and undercooked. Conversely, too low a heat may result in limp and unappealing toast, which can be frustrating for any toast enthusiast.
Maintaining this medium heat may require periodic adjustments based on the type of bread you are toasting. For instance, denser breads, such as wholegrain or sourdough, may benefit from a longer toasting duration at medium heat. If your initial attempts yield variations in toastiness, take note of the heat levels and adjust as necessary. A consistent temperature will ensure a reliable toasting experience, guaranteeing that each slice meets your expectations for a delicious breakfast or snack.
Recommended Toasting Duration in a Frying Pan
Toasting bread in a frying pan typically takes around 2-3 minutes per side, depending on your heat settings and the type of bread. It is vital to keep a close watch on your bread during this process to prevent overcooking or burning. The timing may vary based on the thickness of the slices; thicker pieces generally require more time to achieve that perfect crispness.
For optimal results, flip the bread halfway through the toasting process. This practice not only promotes even browning but also allows you to keep a close eye on the progress. If you’re aiming for a specific level of crispness, feel free to adjust the time according to your preferences. Some individuals may prefer a light toast, while others enjoy a darker, crunchier finish. By mastering the timing, you can perfect the art of frying pan toasting and create toast that delights the senses.
Exploring Different Types of Bread for Frying Pan Toasting
Absolutely, various types of bread can be toasted in a frying pan. Whether it’s white, wholemeal, or artisan sourdough, each type offers distinct flavours and textures when toasted. However, the toasting duration may need adjustment depending on the density and moisture content of the bread, making it essential to experiment for the best results.
Lighter breads, such as white sandwich bread, will toast quickly, often requiring less time than denser varieties like rye or sourdough. It’s crucial to consider the thickness of the slices as well; thicker slices will generally necessitate a longer toasting period. Experimenting with different kinds of bread can lead to delightful discoveries, as each type offers unique flavours that can enhance your meal. This versatility is what makes using a frying pan an excellent method for toasting various breads.
Proven Techniques for Toasting Bread Without a Toaster
Culinary Expert Recommendations for Toasting Bread
Culinary professionals often recommend specific techniques for toasting bread without depending on a traditional toaster, underscoring methods that enhance both flavour and texture. Using a grill is a popular choice among chefs, as it imparts a charred flavour that many find appealing. The high heat of grilling caramelises the sugars in the bread, yielding an attractive crust that elevates the toast experience. Alternatively, the oven is celebrated for its even toasting capabilities, especially when preparing larger quantities of bread, making it ideal for family gatherings.
Chefs may also advise pairing certain types of bread with specific methods. For example, sourdough is frequently grilled to achieve a smoky flavour, whereas lighter breads are better suited for the oven for consistent toasting. This expert insight highlights the importance of selecting the appropriate method based on the type of bread being used, ensuring that every slice is toasted to perfection and packed with flavour.
Strategies for Achieving Consistently Perfectly Toasted Bread
Achieving consistently perfectly toasted bread necessitates careful attention and strategic adjustments based on your kitchen setup. One key step is closely monitoring the bread throughout the toasting process. This vigilance helps you catch any potential issues before they escalate, ensuring that your toast maintains the desired colour and texture, which is essential for a delightful breakfast.
Adjusting heat settings is another critical factor. Many chefs recommend starting at medium heat and modifying as necessary. If you notice the bread is toasting too quickly, reducing the heat can help. Conversely, if you prefer a darker toast, a slight increase in temperature may be warranted. Additionally, flipping the bread regularly ensures even browning, which is key to achieving that perfect slice. By implementing these actionable steps, you can refine your toasting technique and consistently produce outstanding results that will impress your guests.
Avoiding Common Mistakes When Toasting Bread
When toasting bread without a toaster, several common mistakes can undermine your efforts. A major issue stems from using excessively high heat, which can scorch the bread before it has a chance to toast properly. Another frequent error involves neglecting to flip the bread; failing to do so can result in uneven toast, with one side burnt while the other remains pale and unappealing.
Overcrowding the pan is another common pitfall. When multiple slices are crammed together, they may not receive adequate heat, leading to uneven toasting. Real-world examples illustrate this point: many home cooks find their toast lacks a golden finish due to insufficient space in the pan. To rectify these mistakes, ensure proper heat settings, flip the bread regularly, and provide ample room for each slice in your pan. These adjustments can significantly enhance your toasting outcomes, allowing you to enjoy perfectly toasted bread every time.
Expert Insights on Toasting Bread in the Oven
Setting the Ideal Oven Temperature for Toasting Bread
When using an oven for toasting bread, preheating to a temperature range of approximately 180-200°C is ideal. This temperature ensures that the bread toasts evenly without the risk of burning, creating a satisfying crunch on the outside while maintaining a soft interior. A hotter oven can lead to rapid browning on the exterior while leaving the inside soft and chewy, which can be disappointing. Conversely, too low a temperature may result in a longer wait without achieving the desired crispiness.
The advantage of using an oven lies in its ability to distribute heat evenly, making it an excellent choice for toasting multiple slices simultaneously, perfect for gatherings. Preheating the oven is a crucial step; placing bread in a cold oven can lead to uneven cooking and disappointing results. By adhering to the recommended temperature range, your toasting experience will be much more reliable and enjoyable, allowing for delightful results every time.
Optimal Arrangement of Bread in the Oven for Even Toasting
Proper arrangement of your bread in the oven is vital for achieving even toasting. Place the bread slices on a baking sheet in a single layer, ensuring they do not overlap. Overlapping can lead to uneven browning, as the bread pieces may shield one another from the heat, preventing optimal toasting. This simple step is crucial for achieving that perfect golden hue.
Using a baking sheet lined with parchment paper can also facilitate the process, making it easier to remove the bread once toasted. For best results, consider rotating the baking sheet halfway through the cooking time to ensure even exposure to heat. This simple yet effective method guarantees that every slice comes out with a consistent colour and crispness, creating a satisfying toasting experience that everyone will love.
Determining the Ideal Toasting Duration in the Oven
Toasting bread in the oven typically takes about 5-10 minutes, depending on your desired level of toastiness. Keeping a watchful eye on the bread is vital to prevent burning, especially as different ovens may have slight variations in heating. Flipping the bread halfway through the toasting process helps achieve an even finish, allowing both sides to develop a beautiful, golden brown hue that is visually appealing.
If you’re aiming for a lighter toast, checking the bread around the 5-minute mark is advisable. If you prefer a darker, crunchier result, continue to toast while monitoring closely. This method offers flexibility, enabling you to adjust according to your taste preferences. By mastering oven toasting, you can easily produce batches of perfectly toasted bread for any occasion, ensuring that your toast is a highlight of your meal.
Identifying When Your Bread is Perfectly Toasted
Determining when your bread is perfectly toasted involves visual cues and intuition. Begin checking the bread after approximately 5 minutes. The ideal toast should exhibit a golden brown colour and a crisp texture that invites you to take a bite. If the bread appears pale or soft, it likely requires more time in the oven, which is crucial for achieving that satisfying crunch.
The aroma can also serve as a helpful indicator; the smell of toasted bread is distinctive and signals that it’s nearing completion. If you’re ever in doubt, you can slice a piece to check its texture. This approach allows you to refine your toasting technique, ensuring that your bread meets your standards of perfection every time, leaving you and your guests delighted.
Grilling Bread for a Unique Charred and Smoky Taste Experience
Choosing the Most Effective Grill for Toasting Bread
Both gas and charcoal grills can effectively toast bread and provide distinct flavour profiles. While gas grills are often preferred for their ease of use and precise temperature control, making them ideal for achieving the desired level of toastiness without burning, charcoal grills add an extra layer of flavour, imparting a smoky taste that many enthusiasts appreciate. This unique flavour can elevate your toast to new heights.
When selecting your grill, consider the flavour profile you wish to achieve for your toast. If you’re after a simple, evenly toasted slice, a gas grill may be your best option. However, if you aim to elevate your culinary experience with a charred, smoky finish, a charcoal grill is the ideal choice. Ultimately, each grill type has its advantages, and the choice should be based on personal preferences and the equipment you have available for your cooking adventures.
Preparing Your Grill for Effective Bread Toasting
Proper preparation of your grill is crucial for successful toasting. Begin by preheating the grill to medium heat, ensuring it is adequately heated for effective cooking. Clean the grates to remove any residual food or grease, as these can impact the flavour and appearance of your toast, ensuring a pleasant grilling experience. Once clean, lightly oil the grates to prevent the bread from sticking and ensure a smooth cooking process that yields perfect results.
Achieving even heat distribution is essential, so check that all areas of the grill are heated before placing your bread. You can also use a grilling stone or a cast-iron skillet for more control over the toasting process. These accessories help maintain even heat and create a more consistent toast, making your grilling experience more enjoyable. With the grill prepared, you’re ready to enjoy the unique flavours that come from grilling bread.
Optimal Grilling Duration for Perfectly Toasted Bread
Grilling bread typically takes about 1-2 minutes per side, making it a quick method to achieve that desired charred flavour. Staying close to the grill during this process is essential, as bread can go from perfectly toasted to burnt in just a few seconds, which can be disheartening. Adjusting the grill’s heat may be necessary, depending on the type of bread and its thickness; thinner bread will toast faster than thicker varieties, so keep that in mind.
For best results, flip the bread once before the first side develops too much colour. This prevents burning and allows for an even char across both sides, adding to the enticing presentation. If you’re experimenting with various types of bread, take note of how each reacts to the heat, refining your technique as you go. This attention to detail can significantly enhance your grilled toast experience, making it a delicious addition to any meal.
Best Types of Bread for Grilling
When it comes to grilling bread, dense varieties such as sourdough or ciabatta work exceptionally well. Their sturdy structure withstands intense heat, helping to develop an appealing, charred crust that is both crunchy and satisfying. Lighter breads may become too soft or fragile when exposed to direct heat and can easily fall apart during the grilling process, resulting in a less than ideal experience.
Additionally, slicing the bread thicker for grilling allows for a more substantial surface area that can handle the heat without compromising texture. Experimenting with different types of bread can lead to delightful discoveries; for instance, a rustic whole grain can offer a unique flavour when grilled, enhancing the overall taste of your meals. Ultimately, selecting the right bread will enhance your grilling experience and ensure delicious results that you’ll want to recreate.
Elevating the Flavour of Grilled Bread
Enhancing the flavour of grilled bread can transform a simple slice into a gourmet experience that excites the palate. One popular method is to brush the bread with olive oil or garlic butter before grilling; this adds richness and depth to the flavour, making each bite irresistible. Consider infusing herbs or spices into your oil to create a more complex taste profile that tantalises the taste buds.
Another effective approach is to pair grilled bread with toppings that complement its smoky flavour. Spreads like pesto, tapenade, or even a simple mixture of olive oil and balsamic vinegar can elevate your dish, making it more exciting and flavourful. Experimenting with different flavour combinations will allow you to discover your personal favourites. By taking the time to enhance your grilled bread, you can create a memorable culinary experience that excites the palate and impresses your guests.
Exploring Alternative Methods for Toasting Bread
Using a Microwave as an Unconventional Toasting Method
While unconventional, you can indeed use a microwave to toast bread. However, it’s essential to note that the results differ significantly from those of other methods, as microwaves tend to steam rather than crisp. To microwave toast, place your bread on a microwave-safe plate and heat it in short intervals, checking frequently to avoid sogginess, which can lead to a less than ideal texture.
To improve the texture, consider placing a cup of water in the microwave alongside the bread. This method can help prevent the bread from becoming overly rubbery and chewy. While it won’t achieve the crispiness of fried, grilled, or oven-toasted bread, this method can serve as a quick alternative in a pinch. It’s important to manage expectations; microwave-toasted bread will not deliver the satisfying crunch of other methods, but can be a functional option when time is of the essence.
Advantages of Using a Sandwich Press for Toasting Bread
A sandwich press is an excellent tool for toasting bread quickly and evenly, especially when preparing delicious paninis or grilled sandwiches that require a crispy exterior and warm, melty interior. The design of a sandwich press allows heat to circulate evenly around the bread, enhancing the toasting process and ensuring consistent results.
Utilising a sandwich press can save time compared to traditional methods, as it requires less attention once the bread is placed inside. Additionally, many models come with adjustable settings, enabling you to control the level of browning and crispiness to your preference, making it a versatile addition to your kitchen. This versatility makes the sandwich press a popular choice for those who frequently enjoy toasted bread, offering a reliable and efficient solution that simplifies the cooking process.
How a Broiler Can Effectively Toast Bread
A broiler is an effective tool for quickly toasting bread by utilising high heat from above. To use a broiler, place the bread on a baking sheet and position it close to the heating element, allowing the intense heat to create a beautifully toasted exterior. This method allows for rapid browning, but it requires careful monitoring to prevent burning, as bread can char very quickly under direct heat.
Toasting bread under the broiler typically takes 1-3 minutes, depending on the thickness of the slices and your oven’s specific heating capabilities. It’s beneficial to check the toast regularly, as the intense heat can lead to quick changes in the bread’s colour. Using a broiler is particularly advantageous for those who enjoy a crisp top while maintaining a softer interior. By understanding how to use your broiler effectively, you can achieve perfectly toasted bread with minimal effort, making it a great option for quick meals.
Using an Air Fryer as an Innovative Toasting Technique
Yes, an air fryer can efficiently toast bread, offering a unique cooking method that mimics traditional frying without excess oil. To toast bread in an air fryer, place it in the basket and set the temperature to a moderate level. Cooking times typically range from 3 to 5 minutes, depending on your desired level of toastiness, allowing you to achieve the perfect crisp.
One of the benefits of an air fryer is its ability to circulate hot air around the food, ensuring even cooking and browning. This method can also produce a crispy texture that rivals other toasting techniques, providing you with delicious results. If you enjoy experimenting with flavours, consider adding seasonings or lightly brushing the bread with oil before air frying. The versatility of an air fryer makes it an excellent choice for those looking to toast bread using innovative methods that save time and effort.
Toaster Ovens: A Convenient Option for Toasting Bread
A toaster oven is an excellent appliance for toasting bread, offering the convenience of a traditional toaster while providing added versatility for various cooking tasks. Toaster ovens can cook a variety of foods and typically have adjustable settings that allow you to control the level of browning and crispiness, making them ideal for many culinary applications.
When toasting bread in a toaster oven, you can achieve an even, golden finish similar to that of a conventional oven. Preheating the toaster oven may enhance results, and it is important to keep a watchful eye on the bread to prevent over-toasting. If you enjoy preparing multiple slices at once, a toaster oven can efficiently handle larger batches, making it a practical option for busy kitchens. Overall, a toaster oven is a reliable and adaptable tool for anyone looking to perfect their toast while enjoying the benefits of versatility.
Enhancing Your Toast with Delicious Toppings and Spreads
Popular Toppings to Elevate Your Toast Experience
Toppings can elevate your toast, transforming a simple snack into a culinary delight that caters to various tastes. Some popular toppings include:
- Butter: A timeless choice that melts beautifully into warm bread, enhancing its richness and flavour.
- Jam or Marmalade: Adds sweetness and fruitiness, perfect for breakfast or a light snack that satisfies cravings.
- Avocado: Creamy and nutritious, often seasoned with salt and pepper for added flavour that pairs beautifully with toast.
- Cheese: Melts wonderfully when placed on hot toast, offering a savoury experience that many love, especially with a hint of herbs.
- Nut Butters: Peanut or almond butter provides protein and a rich texture, perfect for energy and a delightful snack.
- Hummus: A healthy, savoury option that pairs well with wholegrain bread, adding a creamy element that enhances taste.
Each topping brings its unique flavour and texture, allowing for endless combinations and creative possibilities. For instance, buttery toast topped with jam can be a sweet treat, while avocado spread serves as a nutritious meal option. Experimenting with various toppings allows you to discover new favourites, creating a toast experience that suits every mood or occasion, ensuring there’s always something delightful to enjoy.
Selecting the Right Spread for Your Toast
Selecting the right spread for your toast is crucial in achieving the desired flavour profile that enhances your meal. Consider the taste you wish to create; if you’re leaning towards something sweet, spreads like honey or fruit preserves can beautifully complement your toast, adding layers of flavour and sweetness.
Alternatively, savoury options such as hummus or ricotta cheese offer a completely different experience that excites the palate. The balance of textures is also worth considering; creamy spreads can pair well with crunchy toasts, while chunky toppings may require a sturdier bread base for optimal enjoyment. Factor in any dietary preferences or restrictions; many delicious vegan and gluten-free spreads cater to various needs, ensuring everyone can indulge. By thoughtfully selecting your spreads, you can create a toast experience that is both satisfying and enjoyable, celebrating the versatility of this beloved dish.
Crafting Gourmet Toast at Home with Quality Ingredients
Gourmet toast can be crafted at home with quality ingredients and a bit of creativity, allowing you to elevate even the simplest meals. Using artisanal breads as your base sets the stage for a gourmet experience, offering rich flavours and textures that are sure to impress.
Consider experimenting with different toppings, such as flavoured butters, gourmet cheeses, or fresh herbs, to enhance the dish further. Combining unique flavour profiles can elevate the gourmet aspect of your toast; for example, a slice of sourdough topped with ricotta cheese, honey, and fresh figs creates a sophisticated dish that tantalises the taste buds. Don’t hesitate to experiment with seasonal ingredients and local produce, integrating unique flavours that reflect your culinary style. Making gourmet toast at home not only allows for creativity but also offers a chance to impress guests or indulge in a special treat that showcases your cooking skills.
Effective Strategies for Making Toast Without a Toaster
Best Practices for Even Toasting
To achieve even toasting, it’s essential to ensure proper heat distribution and flip the bread regularly. This approach allows both sides to receive equal exposure to heat, promoting uniform browning that enhances texture and flavour. Whether you’re using a frying pan, oven, or grill, keeping a close eye on the bread is crucial to prevent one side from browning too quickly, which can lead to disappointing results.
Another best practice is to avoid overcrowding the cooking surface. Providing adequate space for each slice ensures that hot air can circulate effectively, resulting in consistent toasting that delights the palate. If you’re toasting multiple pieces, consider working in batches to maintain control over the cooking process. By adhering to these best practices, you can develop a successful toasting technique, resulting in perfectly toasted bread every time that elevates your meals.
Strategies for Saving Time When Toasting Bread
Saving time while toasting bread comes down to preparation and efficiency. Preheating your cooking surface, whether it’s a pan, oven, or grill, allows you to start toasting immediately, maximising your time in the kitchen. Additionally, preparing multiple slices at once can significantly reduce overall cooking time, ensuring you have toast ready for everyone.
Utilising appliances like a toaster oven or sandwich press can yield faster results compared to traditional methods, as these devices often have settings specifically designed for quick toasting. If you’re using a frying pan, consider opting for a larger one to accommodate more slices, maximising your cooking time. These actionable steps will streamline your toasting process, leaving you with more time to enjoy your meal and savour each delicious bite.
Reliable Methods for Toasting Bread Effectively
When it comes to reliable methods for toasting bread, using an oven or frying pan stands out due to their control over heat and ability to achieve even results. These methods not only allow for consistent browning but also provide flexibility in accommodating various bread types and thicknesses, making them versatile options.
Real-world examples demonstrate the effectiveness of these methods; many home cooks favour frying pans for their speed and direct heat control, while others appreciate the convenience of an oven for larger batches. Ultimately, both methods offer reliable results when approached with care and attention. By understanding the nuances of each technique, you can confidently toast bread to perfection, no matter the occasion, ensuring your toast is a highlight of your meals.
Troubleshooting Common Toasting Issues
Why Is My Bread Burning Instead of Toasting Correctly?
If your bread is burning instead of toasting, it’s likely due to excessively high heat settings or inadequate monitoring. When the heat is too high, the exterior can char quickly while the interior remains undercooked, resulting in unsatisfactory toast. To rectify this issue, adjust your heat settings to a medium level and keep a close watch on the bread during toasting, which is crucial for achieving the desired results.
Another factor to consider is the thickness of your bread; thicker slices may require lower heat and longer cooking times to ensure proper toasting. If burning occurs frequently, experimenting with different types of bread can also lead to improved results, as some breads respond better to specific cooking methods. By making these adjustments, you can effectively prevent burning and enjoy perfectly toasted bread that is delicious and appealing.
How to Fix Unevenly Toasted Bread
Unevenly toasted bread can result from improper heat distribution or inadequate flipping. To rectify this issue, start by flipping the bread more frequently during the toasting process. This ensures that all sides receive equal exposure to heat, resulting in a more uniform outcome that is aesthetically pleasing and enjoyable.
Additionally, check that your bread slices are cut evenly; inconsistent thickness can lead to uneven toasting, as thinner slices will cook faster than thicker ones. If you’re using a cooking surface that doesn’t distribute heat evenly, consider rotating or repositioning the bread throughout the process for more consistent results that satisfy your expectations. By implementing these strategies, you can achieve a perfectly toasted slice every time that enhances your meals.
What to Do If Your Toast Is Too Soft?
If your toast is too soft, it may require adjustments in toasting time or temperature. Increasing the toasting time slightly can help achieve a crispier texture that many desire. If this approach doesn’t yield the desired results, consider increasing the temperature marginally to promote better browning and a more appealing finish.
Ensure that the bread is not overly thick, as thicker slices may take longer to toast adequately. If you’re using methods like the microwave, remember that the texture may differ from traditional toasting; in such cases, reconsidering the cooking method altogether can yield better outcomes. By making these adjustments, you can enjoy a perfectly toasted slice that meets your texture preferences, elevating your toast experience.
Frequently Asked Questions About Toasting Bread
Can I toast frozen bread?
Yes, you can toast frozen bread using a frying pan or oven. Just add a minute or two to the toasting time to ensure it thaws and toasts properly, resulting in deliciously warm slices.
Is it safe to toast bread on an open flame?
Toasting bread over an open flame is possible, but it requires careful monitoring. Ensure the bread is kept at a safe distance from the flame to prevent burning and ensure even toasting.
What types of bread work best for grilling?
Dense breads, such as sourdough or ciabatta, are ideal for grilling, as they hold up well to high heat and develop a nice char that enhances their flavour.
Can I toast bread in an air fryer from a frozen state?
Yes, you can toast frozen bread in an air fryer. Just set it to a moderate temperature and check periodically to achieve your desired toastiness without compromising texture.
Why is my toast coming out uneven?
Uneven toast can result from inconsistent bread thickness or improper heat distribution. Regularly flipping the bread can help achieve more uniform results, ensuring each slice is toasted perfectly.
How do I keep my toast from sticking?
To prevent sticking, lightly oil the cooking surface or use a non-stick pan. This simple step can significantly enhance the toasting process, resulting in better texture.
How can I make my toast more flavorful?
Brushing toast with olive oil or butter before toasting can enhance its flavour dramatically. Experimenting with herbs and spices can also add unique tastes that excite the palate.
Is it possible to toast bread in the microwave?
Yes, you can toast bread in the microwave, but the texture will differ from traditional methods. Use short intervals and monitor closely to avoid sogginess.
What’s the best way to store bread for toasting?
Store bread in a cool, dry place to maintain its freshness and optimal quality. For longer storage, consider freezing it and toasting directly from the frozen state for best results.
Can I use a sandwich press for grilling cheese sandwiches?
A sandwich press is excellent for grilling cheese sandwiches, allowing for even melting and a crispy exterior that is sure to please.
Connect with us on Facebook!
The post How to Make Toast Without a Toaster: Simple Techniques appeared first on https://cookinggods.com
The Article Make Toast Without a Toaster: Easy Methods to Try Was Found On https://limitsofstrategy.com
The Article Toast Without a Toaster: Simple Techniques to Experiment With found first on https://electroquench.com